Maker Skills and Attitude:
What did i learn?
This week we started working on something completely new for me. The 3D printer! To realize something with the 3D printer we were challenged to get started with Fusion360. I've never worked with this program before. To get a bit of a feel for what a good approach is to make a housing for a product, Melissa and I got a light that we had to take apart to see how all the components are concealed in a design. After which we started working independently with Fusion360.
Collaborative Learning:
This week we only had to share our components and make sure we were both present to use the components together. Melissa already had quite some experience with 3D applications, just the problem that she was working with a completely different application that could not be installed on my Macbook. So we couldn't help each other much, but we didn't need to do that afterwards. I asked people who worked with the same application. And in the end i had the result i was hoping for.
Assignment:
In pairs, create a 3D product design for one of the eight missing projects suggested in Jolliffe’s article. The goal of the assignment is to think of ways to communicate the concept in the design of the object and its packaging, and to explore ways to make the hardware fit inside, without moving around, and buttons can be pressed without them disappearing into the object. We will break open electronic toys to study their insides in class. It should be possible to open the project and reach the electronics (no glue).
Print your object, and present it on Monday by explaining why this dummy project would be an example of critical making. What does it critique? How does its form (and packaging) convey that?
1. Study the project brief, try to understand what it wants to critique, why it’s important
2. Make a sketch and clay model of the product, think about what it should look like to convey the right message
3. Study and measure the hardware required and decide how to place it inside the design
4. Explore ways to keep the hardware in place (study other electronics objects)
5. Design your object using a 3D modelling software
6. Print your product, and assemble (it doesn’t have to work electronically!)
7. Bonus: design and create the packaging
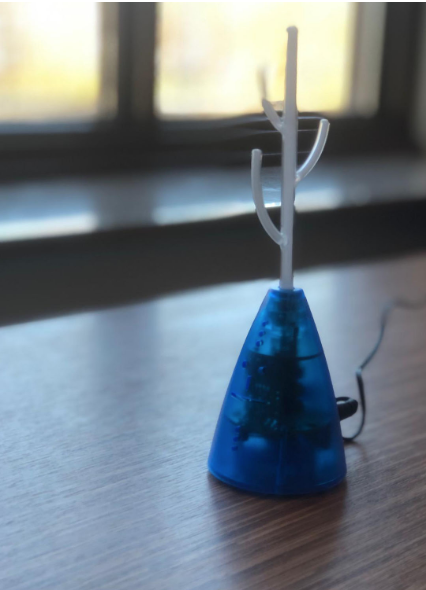
Cactuslamp:
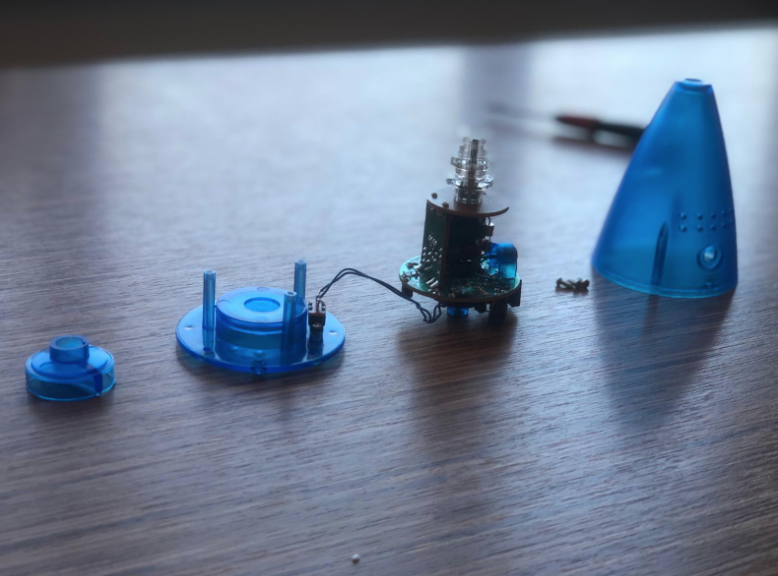
Cactuslamp: disassambled
Meet the Housing!
In class, Melissa and I got a product that we had to take apart. We chose the cactus lamp. After taking it apart we found out that 5 components were hidden in the housing of the cactus lamp. These were placed using 3 plastic rings that gave the housing reinforcement. It was a very complicated construction. The complicated was an eye opener for us that we really had to think carefully how we could make something like this ourselves.
Lifetime Health Care Costs Tally Meter.
Concerned about how much your health care us costing you in the long run? Build the LHCCTM to keep track and save money at the same time! The LHCCTM is a pocket -based digital recorder that links wirelessly to your HMO health care povider. Giving you a daily, monthly and liftime tallly for your ongoing healthcare costs. Visits to the hospital can be expensive, but the LHCCTM allows you to keep on top of these costs with its clear. 7'' LED readout. Materials and Skills required For the actual assigement we have to make housing for the given parts for the assigment here on the left by using 3D printing.
Before we can start on our 3D model we were trying to figure out for who we are actually desigining. The first step is measuring all the parts we have with the use of a caliper. Because i have to chear the components we decided to take a picture from above and from the side. By using photoshop we can add the measurments. so it becomes clear.
- permission of HMO provider to acces billing information online
- Arduino-compatible processor
- Red LED displays
- Lithium-Ion battery pack
- some programming skills
- Adequate eyesight and health to complete assembly
Our personal assigment:
Research:
To make a design for a care institution it is important that it becomes a simple product that does not have the appearance of a commercial product. So I also want to keep the design very clean and try to print with a white colour. This is how it will give me the best feeling for the target group.
At school we learned about simple designs. The Apple and Braun brands are a good example of this. They use many of the same materials and techniques. I will try to make something that fits their designs.
Braun: Apple:
The components measured in all views with
Using Fusion360 for the first time!
I had experience with other 3D programs before, but this was completely new to me. It was a bit of a puzzle to figure out how the program worked. When I understood the basics, I made the design that I wanted to make beforehand. then asked Kaj to help with the printer settings.
The hardest part was to find out exactly where the components had to be placed. You can't test in advance if everything fits.
My 3D sketch in Fusion360
Materials
PLA Filament for 3D Printers - 1.75mm Diameter - White.
I would like to use material with the color white. The reason for this is because I wanted to make something with the braun/apple look.
Note that there are no leftovers in the 3D printer. In my design there was a different color mixed with the white. If I could have known this beforehand, I would have prevented this from happening.
FINAL!
You can download my files on dropbox!
Click here!
Components to work with:
- Permission of HMO provider to acces
billing information online
- Arduino-compatible processor
- Red LED displays
- Lithium-Ion battery pack
- Push buttons
- Some programming skills
- Adequate eyesight and health to
complete assembly
We made a map to work with in the 3D program.
Yes, Make things!
Now we have an assignment, the components are measured and ready to make an enclosure in a 3D program. Melissa has experience with another program that doesn't work on my computer, unfortunately. Luckily there are several fellow students who run off with the same software (Fusion360). Sometimes I asked Asle and duyh about the content of the program. They were able to tell me how I could work in multiple layers, for example. Kaj then helped me prepare the print for the 3D printer. I also learned how to generate a gcode for the 3D printer.
Printing my design
Conclusion
It was fun to learn and design new programs in 3D. It was also interesting that you had to think very carefully about what it looks like on the inside. The functionality has to be considered before anything else.
I'm very satisfied with the end result. It was my first time to get acquainted with 3D printing in combination with an assignment and a 3D program. I learned a lot of new things in one week.